Dec 4, 2011

PoTtErY bArN sTyLe UpCyClEd ChRiStMaS bUlBs!


Hey There! so I bought some cheep-y cheep Christmas bulbs at Dollar Tree and decided to modify them slightly to match my decor! They cost less than $3 to make and it took no time at all! To re-create this project you'll need any of your old Christmas bulbs or if you don't have any like me you can buy a pack of 7 for $1 at dollar tree {it doesn't matter what color they are because they will be completely covered} twine, a hot glue gun, and any ribbon to match your decor!

1.Begin with your recycled ornaments & put a dab of glue around the very top of your ornament and attach your twine.

2. Begin wrapping the twine around the ornament {making sure not to burn yourself}
3. Continue wrapping until it is completely covered and cut off the excess twine

4. Tie a bow on top to match decor & your all done!

ENJOY YOUR NEW UPCYCLED POTTERY BARN STYLE TREE DECOR!
Photobucket

Dec 3, 2011

TREE STAR {DIY..pottery barn style}


Hey There... so I searched and searched all over and couldn't seem to find the perfect tree topper to match the rest of my Christmas decor! You see, some people might be the mix and match types... but not this girl  {I'm more of the crazy, color coordinating, search for 5 hours on the Internet before I just decide to make it myself cuz nobody has the darn things kinda girl} sooooo... I went to good old dollar tree and decided with a little spray paint and an hour I could make a perfectly good one myself! & because I decided that this was so incredibly easy and cheep that i might share it will y'all! For this project you're going to need two tin stars {I got mine at dollar tree, but if I've also seen some pretty dang cute ones at my local craft store that wouldn't need painting}, a wire coat hanger, dark colored spray paint, jute or twine, and hot glue gun!

1. take your wire hanger and pliers and bend into a cone shaped circle pattern with about an inch peek at the top.

2. lay the hanger and both stars face up on wax paper and spray paint, make sure the hanger gets rotated and receives several coats of paint to ensure that its all covered.

3. when dry run your glue gun around the perimeter of the inside of the star and an inch up from the bottom to secure the hanger inside the star shape and then place the two sides together.

4. After it has completely cooled down place a dot of hot glue at the top point of the star and secure the twine.
5. Continue wrapping the twine around the star, making sure to secure it with glue every so often { don't burn yourself!!! I got myself good quite a few times, I feel like I don't have any finger tips left ha ha}
6. Once all areas have been covered and no more paint is showing tie a not in the back of your star to secure and your all done!

ENJOY YOUR NEW POTTERY BARN STYLE STAR.... THE BEST PART IS THAT IT WAS ONLY $2 !!! HAPPY TREE DECORATING!
Photobucket

Nov 23, 2011

TeXaS RoAdHoUsE CiNnAmOn HoNeY BuTtEr!


Hey There, so today I'm gonna share quite possibly the most delicious recipe ever! Well as far as butter goes anyway haha. I'm pretty sure even Paula Deen herself would be proud of this butter! Its the super duper top secret recipe to Texas Roadhouse Cinnamon butter... and its so easy!! All you need is a pint jar, 2 sticks of butter, 1 cup of powdered sugar, 1 cup of honey, and 2 tsp of cinnamon. (I'm pretty sure y'all have that in your pantry right now!)

1. Place butter in a mixing bowl, room temp works the best so its easy to mix!

2. Pour in honey & mix together until you have a paste mixture.
3. Add powdered sugar in small amounts while mixing.

4. Add cinnimon to mixture & whip together until its fluffy and holds a peak.

5. I used a canning funel and poured my mixture into a pint ball canning jar.

6. You can certainly add a fun tag & a ribbon and give with rolls as a gift!!...this would especially be awesome for neighbor gifts for the holidays, or to sell in smaller jars at a bake sale!!                            
       
ENJOY  LICKING SOME BUTTER!! =D
Photobucket

Nov 18, 2011

fastest CaRaMeL aPpLeS ever!


Hey There
! so I'm going to share a super fast super duper easy & delicious CARMEL APPLE 
recipe with ya! 

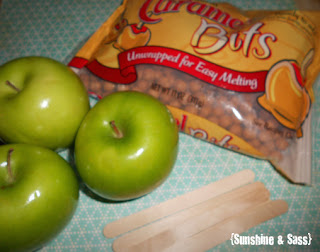
1. I started with 5 granny smith apples... something about the sour with the sweet is just delicious. 
2. Wash all five of the apples off, now my grandma told me the trick was to sand the apple just slightly to rough up the wax to insure that the carmel didnt just slide right off ha ha.
3. Place a stick next to the core of the apple (some people get super fancy & go buy pointed kabob sticks) but little ol me just used Popsicle sticks cuz that's what I had on hand.
4. Melt your caramel....Now my grandma always made it from scratch and it was WONDERFUL, but I don't have that much patience time so I took the easy road and just bought packaged caramel. (Even better I got the kraft caramel bits, cuz these little guys are in balls and all ready to just jump in your pan... you don't even have to unwrap them)
5. I think my caramel took close to 5 minutes to get all warm and bubbly and ready for dippin' but depending on your stove it might go even faster, although I would recommend keeping it on med/low heat because it will burn if you try to rush the process.

6. Then after they are all coated with caramel and had been sitting a good 5 minutes I melted some white Almond Bark in the microwave, placed it in a zip-lock baggie and cut the tip to get a really pretty drizzle over the caramel. 
7. You can certainly add sprinkles if you have them, I couldn't find all of mine so I just left them plain. 

NOW GO ENJOY YOUR APPLES, THEY'RE ALMOST A HEALTHY SNACK! ha ha =D
Photobucket

Nov 17, 2011

DiEt CoKe BrOwNiEs !!

Hey There... so today im gonna blow your mind!! ... you ready for it? DIET COKE CAKE! yep you heard me right, cake made with nothing but diet coke (genius right) well I was searching around on the internet & found this recipe for diet coke cake & it might have possibly changed the way I bake cake FOREVER!....and hopefully it does the same for you too! (because lets be honest now you can eat double the slices) =D

1. Bake cake or brownie according to box directions but instead of adding water, oil, & eggs ... add 1 can or a cup and a half of your favorite diet beverage.... one more awesome thing about this recipe (that is if you can handle any more awesome-ness for one day, is that you can now eat the batter and not have to worry about raw eggs!!...I LOVE rainbow chip cake mix with diet 7 up & dip your teddy grams into it yummmmmy!

2. The batter for brownie mix should be slightly runnier than normal, but that's ok, bake for allotted time plus about 6 minutes, or until a toothpick comes out clean.
3. I always like to finish mine of with a little whip cream... if you get the light version that only adds 20 calories... the brownies should now be about 105 calories a slice! 

HAVE FUN EATING YOUR NEW SKINNY BROWNIES !!
Photobucket

Nov 15, 2011

I LOVE LOVE LOVE fall !

 Hey so I just wanted to tell you all how much I LOVE the fall months....everything about it makes me sooo insanely happy!
The trees changing color, the awesome smell of hot cider & pumpkin pie baking, the fall time crafts and my favorite little pumpkin candies (you know the ones I'm talking about)... the licorice flavored little guys with the happy faces, I have always loved those since i was a little girl ! I even used them for part of my decor this fall =D
 I love the baking and the Christmas music in the grocery store, and call me crazy but i even LOVE black Friday shopping! There is something really exciting about pulling an all nigher with my sister and leaving at 3 in the morning to stand in line at Target to get a really awesome deal on like socks or something else i really didn't need to fight off hoards of people to find a parking spot for really useful! ha ha I hope all of you have a wonderful thanksgiving with your families! 
MUCH FALL SEASON LOVE !
Photobucket

Nov 14, 2011

FaLL cAkE bALLs !!

Hey Y'all so today I have a modified cake pop tutorial for ya... I'm sure everybody out there has done cake pops at least once...but for those tiny few of you that haven't... today's your lucky day! So we're talken about pretty easy stuff here and it will look like you spent a zillion hours on these little babies...you'll want to start off with a regular cake mix, almond bark, frosting, and sprinkles that's it folks ( I'm telling ya it couldn't get much simpler).And the super duper thing about cake balls is you can do them with any cake batter in any color with any sprinkles I pretty much just saved you a lot of time when it comes to finding the perfect tiny appetizers for your parties...you can thank me later ha ha
1. Mix your cake mix as the directions say and bake the cake in a regular 9x13 in pan
2. After cake has cooled crumble it up into small bits and dump in bowl
3. Mix in the frosting flavor of your choice, and this is the fun part because you can do it with your hands until it makes a paste like mixture... I only used about half of my container of frosting.
4. Take a melon baller and collect a small bit of the dough and place on cookie sheet, repeat this process until all the dough is gone
5. Place in the freezer for a few hours until the balls are firm.
6. Once the balls are fully frozen melt the almond bark and dip the balls into the melted chocolate, then add sprinkles as you like
There ya have it some super yummy fall cake balls that would be soooo easy to duplicate for all you holiday parties! =D
Photobucket